 Skip to content
How To Replace Cable On Garage Door?
Garage doors are crucial for the security and functionality of our homes, and the cables play a vital role in their operation. Over time, these cables can wear out or break, requiring replacement. Replacing a garage door cable can seem daunting, but with the right tools and steps, it can be a manageable DIY task. This guide will walk you through the process of replacing the cable on your garage door safely and effectively.
Understanding Garage Door Cables
Garage door cables work in conjunction with the springs to lift and lower the door. There are two primary types of cables: torsion cables and extension spring cables. Torsion cables are used with torsion springs, which are mounted above the door. Extension spring cables are used with extension springs, which are located on the sides of the door. Knowing which type of cable your garage door uses is crucial before beginning the replacement process.
Tools and Materials Needed
Before starting, gather the following tools and materials:
- Replacement garage door cables
- Adjustable wrench
- Locking pliers
- Safety glasses
- Work gloves
- Stepladder
- Tape measure
- Winding bars (for torsion spring doors)
- Socket wrench set
Safety Precautions
Safety should be your top priority when working on garage doors. The springs and cables are under significant tension and can cause severe injury if not handled correctly. Always wear safety glasses and gloves to protect yourself from accidental injuries. If you are uncomfortable working with high-tension springs, consider hiring a professional.
Step-by-Step Guide to Replacing Garage Door Cables
Step 1: Disconnect the Garage Door Opener
Start by unplugging the garage door opener. This prevents accidental operation while you are working on the door. If your door has a manual lock, engage it to keep the door in place during the process.
Step 2: Open the Garage Door
Using the manual release handle, disconnect the door from the opener. Lift the garage door to the open position and secure it with locking pliers. Place the pliers just below the bottom roller on both sides of the track to prevent the door from closing unexpectedly.
Step 3: Remove the Old Cable
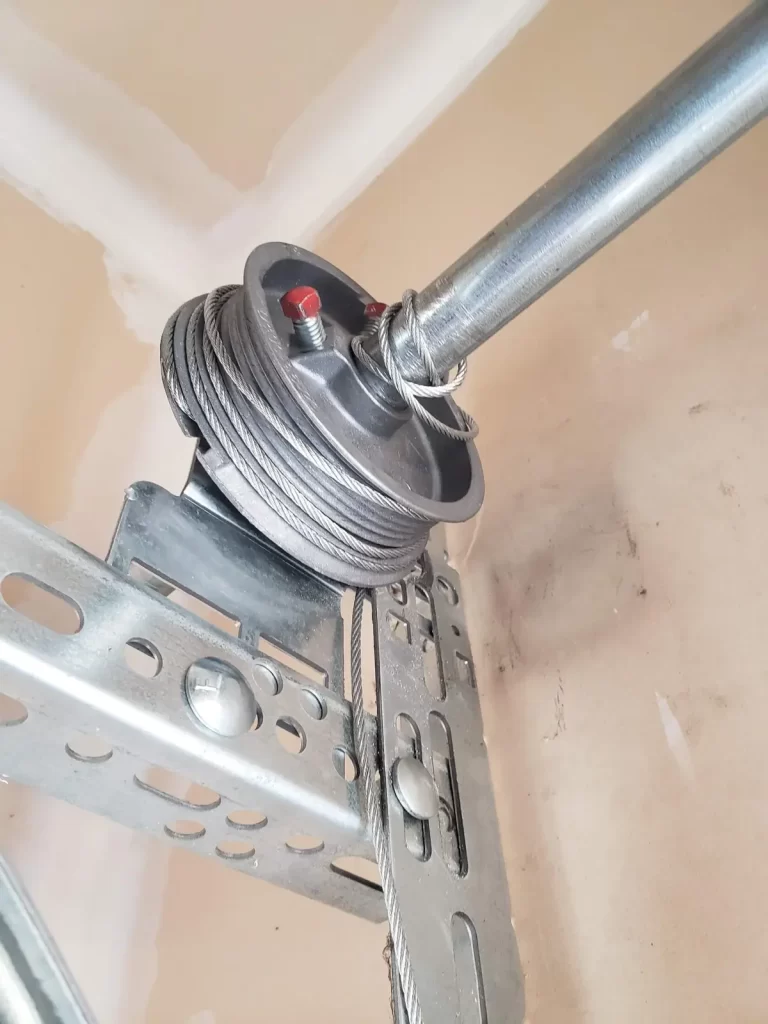
For torsion spring systems, begin by unwinding the tension on the springs using winding bars. Insert the bars into the winding cone and carefully turn them to release the tension. Once the tension is released, remove the cable drum by loosening the set screws with an adjustable wrench. Slide the old cable off the drum and out of the bottom bracket.
For extension spring systems, ensure the door is fully open and the springs are not under tension. Disconnect the old cable from the bottom bracket and the pulley system.
Step 4: Install the New Cable
For torsion spring systems, thread the new cable through the bottom bracket and attach it to the cable drum. Wind the cable around the drum, ensuring it is seated correctly in the grooves. Tighten the set screws on the cable drum to secure the cable in place. Use the winding bars to re-tension the torsion springs, following the manufacturer’s specifications.
For extension spring systems, thread the new cable through the pulley system and attach it to the bottom bracket. Ensure the cable is properly aligned and taut.
Step 5: Test the Door
Remove the locking pliers from the tracks and manually lower the garage door. Reconnect the door to the opener and plug it back in. Test the door by opening and closing it several times to ensure the new cable is functioning correctly and the door operates smoothly.
Troubleshooting Common Issues
After replacing the garage door cable, you might encounter a few common issues. Here are some troubleshooting tips:
Door doesn’t open or close properly: Check the cable tension. If it is too loose or too tight, adjust it accordingly.
Cable slipping off the drum or pulley: Ensure the cable is properly seated in the grooves and the set screws are tightened securely.
Uneven door movement: Verify that both cables are of equal length and tension.
Maintenance Tips
Regular maintenance can extend the life of your garage door cables and prevent future issues. Here are some tips to keep your garage door system in good condition:
Inspect cables regularly: Look for signs of fraying, rust, or wear and replace them as needed.
Lubricate moving parts: Apply a lubricant to the springs, rollers, and hinges to reduce friction and wear.
Check cable tension: Ensure the cables maintain proper tension and make adjustments if necessary.
Clean tracks: Keep the tracks free of debris to ensure smooth operation.
When to Call a Professional?
While replacing garage door cables can be a DIY project, there are situations where it is best to call a professional. If you are unsure about any part of the process, or if your garage door uses high-tension torsion springs, professional assistance is recommended. Additionally, if the door is not functioning correctly after replacing the cables, a professional can diagnose and fix the issue safely.
Conclusion
Replacing the cable on a garage door requires careful attention to detail and adherence to safety protocols. By following this guide, you can replace your garage door cables and ensure your door operates smoothly and safely. Regular maintenance and inspection can help prevent future issues and extend the life of your garage door system. If in doubt, do not hesitate to seek professional assistance to avoid injuries and ensure the job is done correctly.
A1 Garage Doors is providing maintenance and installation services related to garage doors and their parts. If you’re looking for a trustworthy service by skilled technicians you can count on, give us a call at 343-309-9964 for a free quote.