 Skip to content
How To Replace A Garage Door Bottom Seal?
Introduction
Your garage door bottom seal plays a crucial role in keeping out pests, dirt, and drafts, while also providing insulation and protection against the elements. Over time, however, this seal can wear out, leading to decreased efficiency and potential damage to your garage and belongings. Fortunately, replacing a garage door bottom seal is a relatively simple task that you can do yourself with the right tools and know-how. In this guide, we’ll walk you through the process step by step, ensuring a successful and effective replacement.
Step 1: Gather Your Materials
Before you begin, make sure you have all the necessary materials and tools on hand. You’ll need:
- New garage door bottom seal
- Measuring tape
- Utility knife
- Pry bar or flathead screwdriver
- Hammer
- Nails or screws
- Lubricant (optional)
Step 2: Measure the Existing Seal
Start by measuring the length of your existing garage door bottom seal. Use a measuring tape to get an accurate measurement from one end to the other. It’s essential to measure accurately to ensure you purchase the correct size replacement seal.
Step 3: Remove the Old Seal
Using a pry bar or flathead screwdriver, carefully remove the old seal from the bottom of your garage door. Start at one end and work your way across, gently prying the seal away from the door. Be cautious not to damage the door or the seal track during this process.
Step 4: Clean the Track
Once the old seal is removed, take the opportunity to clean the track where the seal sits. Use a damp cloth to wipe away any dirt, debris, or old adhesive residue. A clean track will ensure a secure fit for the new seal and prevent any obstructions.
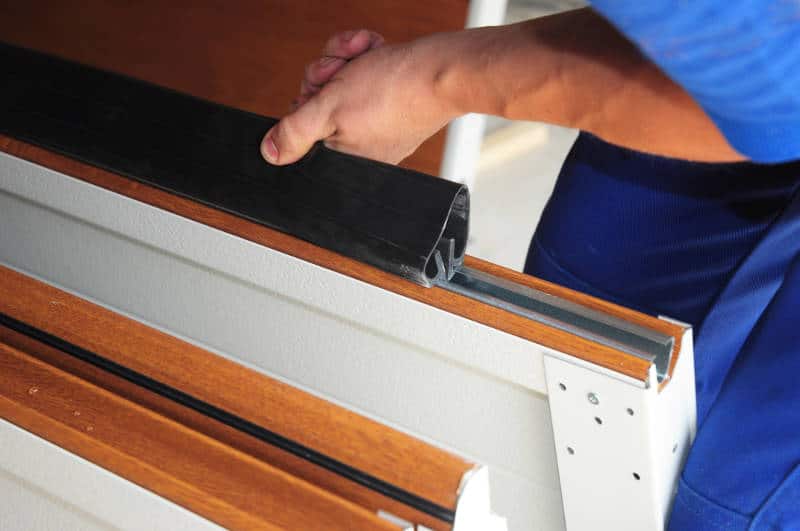
Step 5: Install the New Seal
Unroll the new garage door bottom seal and place it along the bottom edge of the door, lining it up with the track. If necessary, trim any excess length using a utility knife to ensure a proper fit. Start at one end and work your way across, pressing the seal firmly into the track as you go.
Step 6: Secure the Seal
Once the new seal is in place, secure it by either nailing or screwing it into the door. Use a hammer to drive nails through the pre-drilled holes in the seal, or use screws if your seal requires them. Be sure to space the fasteners evenly along the length of the door for a secure hold.
Step 7: Test the Door
After installing the new seal, test the garage door to ensure it operates smoothly without any obstructions. Open and close the door several times to allow the seal to settle into place and make any necessary adjustments if needed.
Step 8: Lubricate (Optional)
If desired, you can apply a lubricant to the new seal to help it glide smoothly along the track and maintain flexibility over time. Silicone-based lubricants are ideal for this purpose, as they won’t attract dirt or dust.
Conclusion
Replacing your garage door bottom seal is a straightforward task that can improve the efficiency and functionality of your garage door while also providing added protection for your home and belongings. By following the steps outlined in this guide and taking the time to ensure proper installation, you can enjoy a secure and well-sealed garage door for years to come.
A1 Garage Doors is providing maintenance and installation services related to garage doors and their parts. If you’re looking for a trustworthy service by skilled technicians you can count on, give us a call at 343-309-9964 for a free quote.