 Skip to content
How To Install Garage Door Rails?
Installing garage door rails can be a challenging task, but with the right instructions and tools, it becomes a manageable project for many DIY enthusiasts. The rails are critical components in the garage door system, as they guide the door’s movement along a track and ensure smooth opening and closing. Proper installation of these rails will prevent operational problems and extend the life of the garage door. Below is a comprehensive guide that will walk you through the process of installing garage door rails.
Gather the Necessary Tools and Materials
Before starting, it’s essential to ensure you have all the necessary tools and materials to complete the task efficiently. Here’s a list of the common tools required for installing garage door rails:
- Power drill
- Wrenches
- Screws and bolts
- Ladder
- Measuring tape
- Level
- Rubber mallet
- Clamps
- Pliers
Once you have gathered all the required tools, it’s time to prepare for the installation.
Prepare the Garage Door Area
Begin by preparing the garage area where the door will be installed. Clear the space to ensure easy movement around the installation area. This includes removing any obstacles such as bikes, shelves, or other stored items that may hinder your ability to work safely.
Next, measure the dimensions of your garage door opening. This will help determine whether the pre-purchased garage door rails will fit correctly or if adjustments need to be made. Make sure the door opening is level and square by using a level and measuring tape. Uneven or non-square openings can cause problems during the installation and with the door’s operation later on.
Once the space is prepped and measurements are taken, lay out the door components and review the installation manual provided by the manufacturer. The manual is crucial since not all garage doors are designed the same, and there may be variations in how different brands and models are installed.
Install the Vertical Tracks
The first rails to be installed are the vertical tracks. These run along the sides of the garage door opening and help guide the door as it moves up and down.
Start by positioning the vertical tracks on either side of the door opening. Ensure that the track is flush with the wall and that the spacing between the door jamb and the track is consistent from top to bottom. This ensures smooth door movement without any obstruction.
With the tracks aligned properly, secure them in place using screws or bolts. Use a level to double-check that the tracks are perfectly vertical before fully tightening the screws. Improper alignment could cause the door to bind or move unevenly.
It’s crucial to note that these tracks should extend just above the height of the garage door. The exact measurement will vary depending on the size and model of your garage door. Be sure to follow the manufacturer’s guidelines.
Install the Horizontal Tracks
After securing the vertical tracks, the next step is to install the horizontal tracks, which guide the door as it opens and moves back along the ceiling of the garage.
Begin by attaching the horizontal tracks to the vertical tracks using the curved arm brackets provided in the installation kit. These brackets will allow for a smooth transition between the vertical and horizontal tracks. Be sure to use the correct brackets that match your door’s specifications.
Position the horizontal track so it is level and extends back toward the rear of the garage. The end of the track should be supported by a bracket attached to the ceiling joists. If your installation kit does not include brackets, you may need to purchase and install additional support brackets to ensure the track is secure.
Ensure that the horizontal track is level and parallel with the ground. An unlevel track could result in the door moving unevenly, putting extra stress on the door mechanism and potentially causing it to fail. Tighten all screws and bolts once everything is in place.
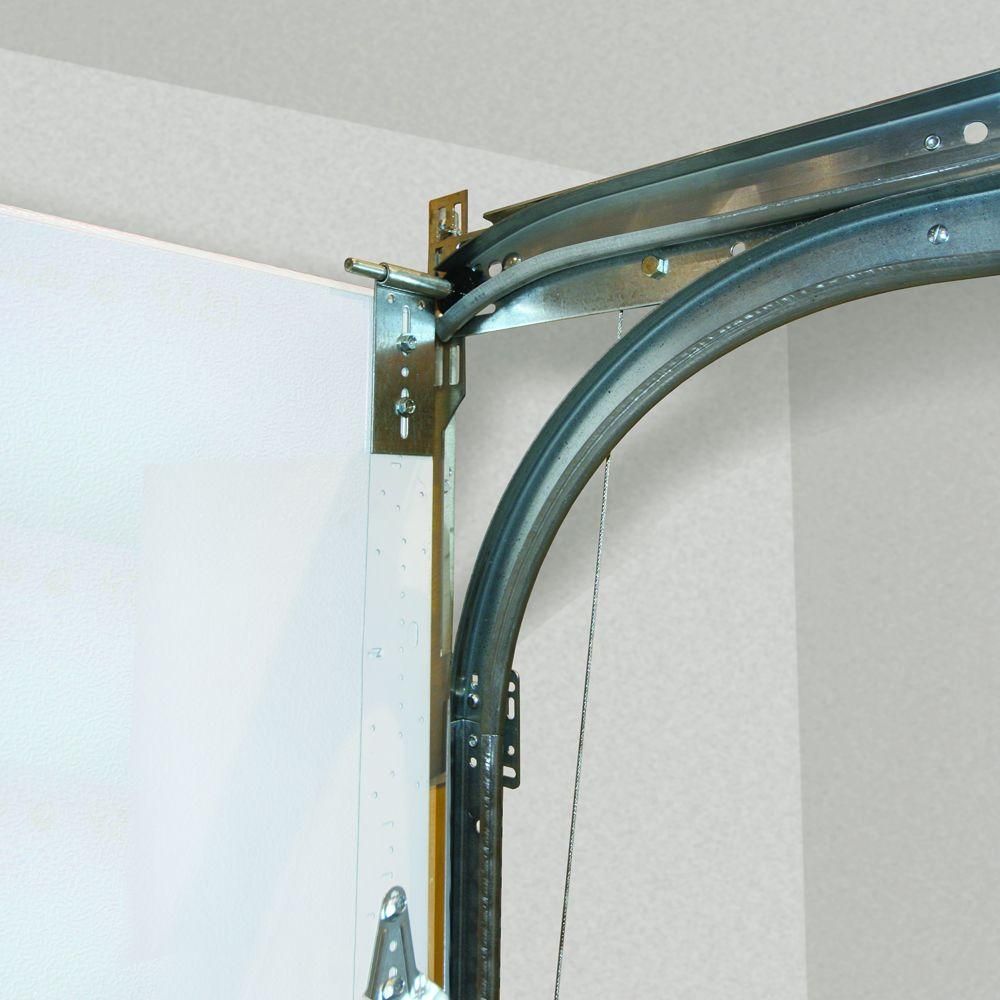
Connect the Curved Tracks
The curved tracks are the components that connect the vertical and horizontal tracks. These tracks ensure that the door transitions smoothly as it moves from the vertical position when closed to the horizontal position when open.
Begin by attaching the curved track to the top of the vertical track. The curved track should align perfectly with the vertical track and should not require any force to connect. Once connected, attach the opposite end of the curved track to the horizontal track.
Ensure that the curve is smooth and does not have any sharp bends or obstructions that could cause the door to catch or bind. Secure the curved track in place using the provided brackets, and tighten the screws and bolts. Double-check the alignment and ensure that the entire track system is secure and level.
Attach the Rollers and Springs
After the tracks are installed, the next step is to attach the rollers and springs to the garage door. These components will allow the door to move along the tracks smoothly.
Start by inserting the rollers into the brackets on the sides of the garage door. Once the rollers are attached, align them with the tracks and insert them into the vertical tracks. It’s crucial to ensure that the rollers are properly seated in the tracks to prevent them from derailing during operation.
Next, install the torsion or extension springs. This step requires careful attention, as the springs are under high tension and can cause injury if not handled properly. Follow the manufacturer’s instructions for installing the springs, and consider hiring a professional for this step if you’re uncomfortable working with these high-tension components.
Once the springs are attached, connect them to the track system. Torsion springs typically attach to the center bracket above the door, while extension springs will be attached to the side tracks.
Adjust and Test the Garage Door System
After installing the rails, rollers, and springs, it’s time to test the garage door system. Begin by manually opening and closing the door to ensure that it moves smoothly along the tracks without binding or hesitation. If the door does not move smoothly, check for any obstructions or misalignments in the track system.
Adjust the track alignment as needed, and tighten any loose screws or bolts. If the door moves too slowly or too quickly, you may need to adjust the tension in the springs. Again, this step should be performed carefully, as improper adjustments can cause the door to malfunction.
Once the manual test is successful, connect the garage door opener if applicable. Test the door with the opener, ensuring that it opens and closes smoothly and that the opener system engages and disengages the door properly.
Final Safety Checks
Before completing the installation, perform a final safety check on the garage door system. Ensure that all components are securely fastened and that there are no loose parts or hardware. Check that the safety mechanisms, such as the auto-reverse feature, are functioning correctly.
If you installed an automatic opener, ensure that the safety sensors are aligned and operational. These sensors are typically located at the bottom of the door tracks and prevent the door from closing if an object is detected in its path.
In conclusion, installing garage door rails is a detailed process that requires careful attention to detail and safety precautions. By following these steps, you can ensure that your garage door operates smoothly and reliably for years to come. If at any point you feel unsure or uncomfortable during the installation, do not hesitate to contact a professional for assistance.
A1 Garage Doors is providing maintenance and installation services related to garage doors and their parts. If you’re looking for a trustworthy service by skilled technicians you can count on, give us a call at 343-309-9964 for a free quote.