 Skip to content
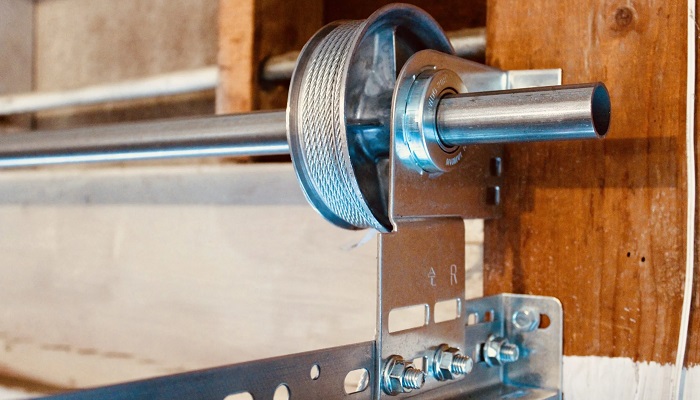
How To Attach Garage Door Cables?
Introduction
Attaching garage door cables is a crucial aspect of garage door maintenance and repair. These cables play a vital role in the smooth operation of the door, providing balance and support. Knowing how to attach them properly can prevent accidents and ensure the longevity of your garage door system. In this comprehensive guide, we will walk you through the process step by step, ensuring that you can confidently tackle this task.
Step 1: Gather Necessary Tools and Materials
Before you begin, gather all the tools and materials you will need for the job. These typically include:
- A ladder
- Safety gloves and goggles
- A wrench or socket set
- New cables (if you are replacing old ones)
- A winding bar
- Safety cables (optional but recommended)
Step 2: Prepare the Work Area
Ensure that the garage door is closed before you start working. This will prevent any accidents or injuries. Place a ladder under the garage door so that you can easily access the cables and springs.
Step 3: Detach the Old Cables (If Applicable)
If you are replacing old cables, you will first need to detach them from the garage door. Use a wrench or socket set to loosen the nuts securing the cables to the bottom bracket and drum. Once the nuts are removed, carefully unwind the cables from the drum.
Step 4: Install the Safety Cables (If Applicable)
Safety cables are an additional safety measure that can prevent serious accidents in case the main cables break. If your garage door does not already have safety cables installed, now is the perfect time to add them. Simply thread the safety cables through the springs and secure them to the brackets on either side of the door.
Step 5: Attach the New Cables
Thread the new cables through the bottom bracket and drum, following the same path as the old cables. Make sure the cables are properly aligned and seated in the grooves of the drum to prevent them from slipping out during operation.
Step 6: Wind the Springs
Using a winding bar, wind the springs to apply tension to the cables. Be sure to follow the manufacturer’s instructions for the number of turns required based on the weight of your garage door. This step is crucial for ensuring that the door operates smoothly and safely.
Step 7: Test the Door
Once the cables are attached and the springs are properly tensioned, test the garage door to ensure that it opens and closes smoothly. Listen for any unusual noises or vibrations that may indicate a problem.
Step 8: Make Adjustments as Needed
If the garage door does not operate correctly, you may need to make some adjustments. This could involve tightening or loosening the springs, realigning the cables, or checking for any other issues that may be causing the problem.
Step 9: Perform Regular Maintenance
Regular maintenance is essential for keeping your garage door in optimal condition. Inspect the cables, springs, and other components regularly for signs of wear or damage, and make any necessary repairs or replacements promptly.
Conclusion
Attaching garage door cables is a task that requires precision and attention to detail. By following the steps outlined in this guide, you can ensure that your garage door operates smoothly and safely for years to come. Remember to prioritize safety at all times and seek professional assistance if you are unsure about any aspect of the process. With proper care and maintenance, your garage door will continue to serve you reliably for many years.
A1 Garage Doors is providing maintenance and installation services related to garage doors and their parts. If you’re looking for a trustworthy service by skilled technicians you can count on, give us a call at 343-309-9964 for a free quote.