 Skip to content
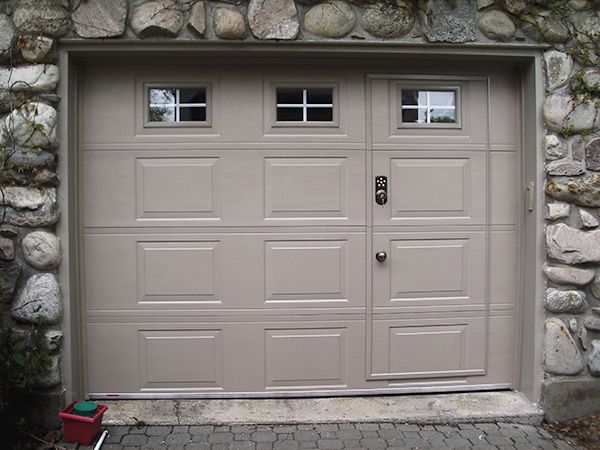
How To Install A Garage Door Entry Door?
Installing a garage door entry door is a practical project that enhances both the functionality and security of your home. This guide will walk you through the steps needed to complete the installation, from selecting the right door to the final adjustments.
Selecting the Right Door
Before diving into the installation process, it’s essential to choose the appropriate door for your garage. Consider factors like material, size, insulation, and style. Common materials include steel, wood, and fiberglass. Steel doors are durable and low-maintenance, wood doors offer a classic look, and fiberglass doors are lightweight and resistant to dents.
Tools and Materials Needed
To install a garage door entry door, you will need the following tools and materials:
- New entry door and frame
- Measuring tape
- Level
- Hammer and nails
- Screwdriver
- Drill and bits
- Shims
- Caulk and caulking gun
- Insulation (optional)
- Saw (for adjustments)
- Measuring and Preparing the Opening
Measure the Opening
Width and Height: Measure the width and height of the door opening to ensure your new door fits correctly. Standard sizes vary, so knowing your exact measurements is crucial.
Depth: Measure the depth of the door frame to ensure the new door frame matches the wall thickness.
Remove the Old Door and Frame
Remove the Door: Unscrew the hinges and carefully remove the old door. Set it aside.
Remove the Frame: Pry off the trim around the door frame with a pry bar, then remove the door frame by unscrewing or prying it loose.
Installing the New Door Frame
Assemble the Frame
Lay Out the Frame: If your new door comes with a disassembled frame, lay out the pieces and assemble them according to the manufacturer’s instructions.
Check for Squareness: Use a square to ensure all corners of the frame are at 90 degrees.
Install the Frame
Position the Frame: Place the new frame into the opening. Use shims to position it correctly.
Level the Frame: Check that the frame is level and plumb. Adjust the shims as necessary.
Secure the Frame: Once the frame is level and plumb, secure it to the wall with screws or nails. Start at the top and work your way down, alternating sides to maintain the frame’s alignment.
Insulate (Optional): If desired, add insulation around the frame before attaching the trim.
Hanging the New Door
Prepare the Door
Attach Hinges: Attach the hinges to the door. Ensure they are aligned correctly and positioned at the same height as the corresponding spots on the frame.
Hang the Door
Position the Door: Lift the door into place and align the hinges with the hinge cutouts on the frame.
Secure the Hinges: Secure the hinges to the frame using screws. Check that the door swings smoothly and fits correctly in the frame.
Installing the Lock and Hardware
Install the Lockset
Mark the Position: Mark the position of the lockset on the door. Most doors come pre-drilled for standard locksets.
Drill Holes: If the door is not pre-drilled, use a template to drill the necessary holes for the lockset.
Install the Lock: Insert the lockset into the holes and secure it with screws. Follow the manufacturer’s instructions for specific details.
Install Additional Hardware
Install the Strike Plate: Align the strike plate with the lock bolt and secure it to the door frame.
Install Handles and Other Hardware: Install the handle, deadbolt, or any other hardware according to the manufacturer’s instructions.
Finishing Touches
Adjust the Door
Check Alignment: Close the door and check for any gaps or misalignment. Adjust the hinges and shims as needed to ensure a tight fit.
Test the Lock: Test the lock to ensure it operates smoothly without any sticking or binding.
Seal the Door
Apply Caulk: Apply a bead of caulk around the outside of the door frame to seal any gaps and prevent drafts.
Install Weatherstripping: Install weatherstripping around the door to improve insulation and energy efficiency.
Install Trim
Cut and Attach Trim: Cut the trim to fit around the door frame. Attach it using nails or screws.
Fill Gaps: Fill any gaps between the trim and the wall with caulk or wood filler.
Final Inspection
Check Operation
Open and Close the Door: Open and close the door several times to ensure it operates smoothly.
Lock and Unlock the Door: Test the lock mechanism to ensure it works correctly.
Safety and Maintenance
Check for Sharp Edges: Ensure there are no sharp edges or protruding screws that could cause injury.
Routine Maintenance: Periodically check the door and hardware for wear and tear. Lubricate hinges and lock mechanisms as needed.
Conclusion
Installing a garage door entry door can seem daunting, but with careful planning and attention to detail, it is a manageable DIY project. By following these steps, you can enhance your garage’s security and functionality while adding a polished look to your home. Remember to measure accurately, level the frame correctly, and test the door’s operation thoroughly to ensure a successful installation.
A1 Garage Doors is providing maintenance and installation services related to garage doors and their parts. If you’re looking for a trustworthy service by skilled technicians you can count on, give us a call at 343-309-9964 for a free quote.