 Skip to content
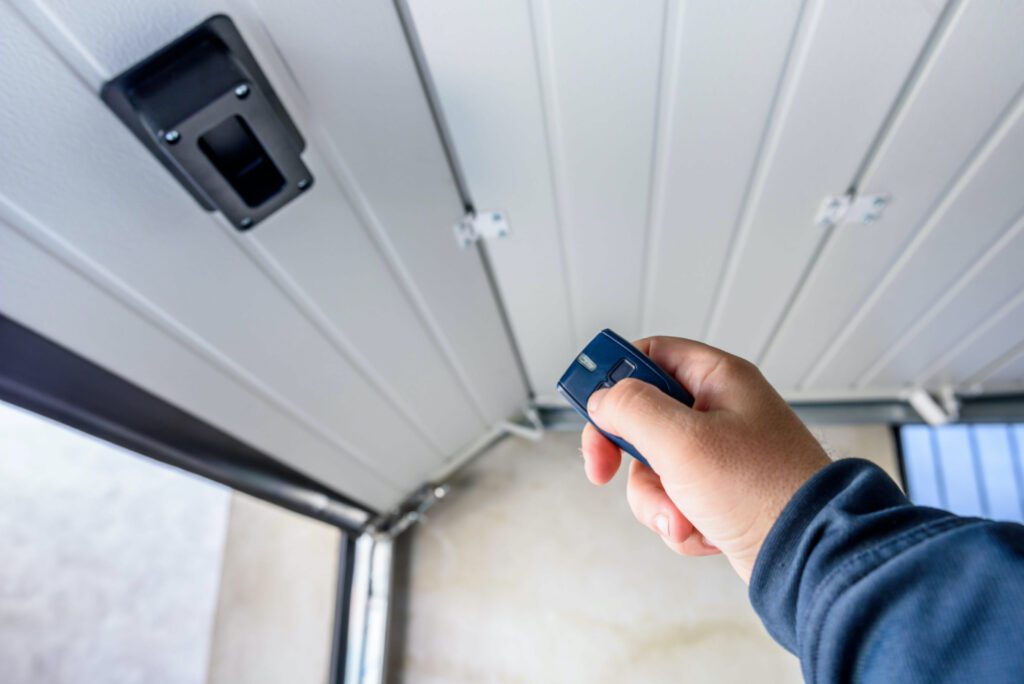
How To Program Overhead Door Garage Door Opener?
Introduction
Garage door openers have become an indispensable convenience for homeowners, providing ease of access and security to their homes. Overhead Door is a renowned manufacturer of garage door openers known for their reliability and functionality. Programming your Overhead Door garage door opener might seem like a daunting task at first, but with the right guidance, it can be a straightforward process. In this article, we’ll walk you through the steps to program your Overhead Door garage door opener effectively.
Understanding Your Overhead Door Garage Door Opener
Before delving into the programming process, it’s essential to understand the components of your Overhead Door garage door opener. Typically, it consists of a motor unit, remote control, wall-mounted control panel, and safety sensors. Each component plays a crucial role in the operation and programming of the opener.
Step 1: Locate the Learn Button
The first step in programming your Overhead Door garage door opener is to locate the “Learn” button on the motor unit. This button is usually located near the antenna wire or on the back panel of the opener. Once you’ve found the Learn button, press it and release it to put the opener into programming mode.
Step 2: Program the Remote Control
With the opener in programming mode, grab your remote control and press the button you wish to use to operate the garage door. Hold the button down until the indicator light on the motor unit blinks, indicating that the programming was successful. Repeat this process for each remote control you want to program.
Step 3: Program the Wall-Mounted Control Panel
If your Overhead Door garage door opener is equipped with a wall-mounted control panel, you can program it to operate the door as well. To do this, locate the programming button on the control panel and press it. Follow the on-screen instructions or refer to the user manual to complete the programming process.
Step 4: Test the Remote Controls
Once you’ve programmed the remote controls and wall-mounted control panel, it’s essential to test their functionality. Stand within range of the garage door opener and press the buttons on the remote controls and control panel to ensure that the door operates smoothly.
Step 5: Program Additional Features (Optional)
Depending on the model of your Overhead Door garage door opener, you may have additional features that can be programmed, such as automatic lighting or vacation mode. Refer to the user manual for instructions on how to program these features to suit your preferences.
Step 6: Install Safety Sensors (If Necessary)
If your Overhead Door garage door opener is equipped with safety sensors, it’s crucial to install them properly to ensure safe operation. Mount the sensors on either side of the garage door, making sure they are aligned and free from obstructions. Once installed, test the door to ensure that it reverses direction when the sensors are obstructed.
Conclusion
Programming your Overhead Door garage door opener is a straightforward process that can be completed in just a few simple steps. By following the guidelines outlined in this article and referring to the user manual for your specific model, you can enjoy the convenience and security of your garage door opener with ease. Take the time to familiarize yourself with the programming process, and you’ll be operating your garage door like a pro in no time.
A1 Garage Doors is providing maintenance and installation services related to garage doors and their parts. If you’re looking for a trustworthy service by skilled technicians you can count on, give us a call at 343-309-9964 for a free quote.